Monday 9 May 2016

Orange and Coconut Polenta Cake

This is one of my favourite creations. Really moist (love/hate that word) and FULL of flavours that just go on and on. Smells amazing too. It's gluten and dairy free and uses coconut sugar so has caramel-ly depth to it. I used eggs from a friend's chickens and most of the ingredients are from local independent shops - except the oranges which I had to get from a supermarket. 
I originally made this as a lemon and coconut cake with postachios on top for mummy but works so well as an orange version too. I used light olive oil and a splash of almond milk as the fat content. The combination of polenta, ground almonds and desiccated coconut make a delectable texture and flavour. I recently made this cake for a parent at school and I believe it went down very well at her birthday lunch.... Happy Birthday! 

You will need:
9inch spring form cake tin
Oven at 180 degrees c
Scales
Electric hand whisk 
2 large bowls.


For the cake:
150ml light olive oil
200g coconut sugar
120g dry fine polenta
80g desiccated coconut 
100g ground almonds
1 1/2 tsp baking powder
3 large eggs
Zest of 1 1/2 large oranges

For the syrup:
1 1/2 oranges - juice of
100g coconut sugar

To decorate:
Toasted flakes almonds
Toasted nuts
Extra desiccated coconut
Any fruit or berries

Prepare your tin by greasing with a little olive oil and line the bottom with baking parchment. Heat your oven

Mix together the oil and sugar. In a separate bowl mix the polenta, almonds, baking powder and coconut.
Add 1 egg and a third of the dry mix to the sugar and oil, mixing well each time. Add your zest and a splash of almond milk. Mix again.
Spoon into your tine and bake for 25-35 minutes until the sides are just coming away from the tin and it is springy to the touch. 

Make your syrup by melting the sugar and juice together over a medium heat until the sugar has dissolved.

Leave to cool a little before pricking holes all over and pouring your syup over the top. Leave to cool completely in the tin, preferably over night. 

Carefully remove from the tin and transfer to your chosen plate. Decorate as you wish with flaked almonds, other nuts, seeds, coconut or berries.

Enjoy with a glass of champagne! 


Friday 12 February 2016

Triple nut brownies

Lovely and gooey, perfect warm with some Booja Booja vanilla ice cream!

You will need:
21cm square tin
225g 85% dark chocolate
225g cashew nut butter
200g coconut palm sugar
2 tsp good vanilla essence
3 large eggs
150g ground almonds
100g chopped pecans
16 raspberries

Prepare your tin and heat oven to 170 degrees C.
Gently melt chocolate and nut butter over a low heat then turn off the heat and stir in the sugar and essence.
Beat in the eggs and then the ground almonds and chopped pecans.
Pour into your tin. Evenly place the raps erries in the middle of what will be each brownie.  Bake for 25-35 min until the top is set but the main part is still gooey. Leave to cool slightly in the tin on a wire rack then cut into 16 squares.
Serve immediately with ice cream or they are equally delicious one their own. If you are going to store them, leave to cool completely then store in an airtight container.

Wednesday 29 July 2015

Vanilla almond layer cake with a ginger honey syrup

A couple of weeks ago a friend asked me to recreate a cake she had seen on Pinterest and I gladly accepted the task. I adore baking and there is no other way I like to spend an hour or two. Sadly, however, our new cottage does not have an oven or hob so actual baking is a bit of a no-no. Luckily (for us) my long suffering Mother lives about a second walk away and was forced to give up her cooker for an afternoon. The cake was to be multi-layered with a simple but pretty filling and topping. I made a creme Chantilly to sandwich the cakes together and a ginger honey to drizzle over the top to finish. Chopped pistachios, fresh juicy figs and physalis bedecked the cake. It really did look pretty and a very summery cake for alfresco dining. The cake was actually to be made for a photo-shoot and we didn't get to eat it until about 10 or 11 at night. Which is probably a good thing as the ginger honey had seeped into the sponge layers making it very moist and sticky. It would look very pretty with red currents, passion fruit or pomegranate too. This would go well with champagne or a cup of tea - so versatile! This is wheat free and I am working on a version with coconut sugar. I used unrefined golden caster sugar this time. You can use any type of milk you like, I used full fat organic cow's milk but almond or coconut would work well too. The butter (I used grass fed organic) could be subbed with good quality coconut oil but be careful with the liquid quantities if you do this - you may want to add a little less milk. I used buckwheat flour which this is ok for those with a wheat or gluten intolerance but I would not recommend using this for those with Celiac disease unless you know you do not have adverse reactions to it. Some people do not have any problems using buckwheat but I would strongly recommend using a different gluten free alternative if you are unsure. If you do make it and with any alterations or changes, do let me know! I am always tinkering with recipes and would love to hear how you would make this delicious cake. 


You will need:
3 8 inch cake tins, greased and lined
Mixing bowl
Electric hand whisk 

For the cake:
8 egg whites - use the egg yolks to make mayonnaise, ice-cream, hollandaise etc.!
1 cup brown rice flour
1 cup ground almonds
1 cup buckwheat flour
1 2/3 cup unrefined golden caster sugar
1 tbsp gluten free baking powder
3/4 cup grass fed organic butter
1/2 cup melted coconut oil
1 1/4 cup organic full fat milk (or almond/coconut/rice milk)
1 1/2 tsp good quality vanilla paste or 1 vanilla pod's seeds

For the cream filling:
500ml organic double cream - you could use coconut cream or coyo yoghurt instead.
1 vanilla pod - seeds scraped out (I always pop the empty pods in with my sugar or almond flour)

For the ginger honey:
1 cup of organic - preferably raw - honey
3 - 4 inches fresh ginger 
1/2 cup water

Fresh fruit of your choice to decorate.


Prepare your tins and pre-heat the oven to 170 degrees C. 
In a large mixing bowl measure out your flours, sugar and baking powder and stir. Next add in your melted coconut oil and butter and mix again. 
Separate your egg whites one at a time so that you don't accidentally let any shell in. Add one egg white to the mix and mix well after each addition. It should be quite frothy and thick by the 8th one! Finally add the milk and vanilla and mix again until just incorporated. 
Pour into the prepared tins - try to get them as even as possible so that the layer are equal on the finished cake. 
Bake in the oven for 20 minutes and check that they are cooked with a tooth pick. They should be just golden but the toothpick should come out clean. Leave to cool completely in the tins over a wire rack. 


Whilst the cakes are cooling, make the ginger honey. Peel the stick of ginger and slice finely. Place your honey, water and sliced ginger in a pan over a medium heat. Bring to a simmer for 5 minutes and then take off the heat. Leave to steep for at least an hour - longer is better. When you are ready to serve, fish out the ginger and discard. 


To make the cream filling simply whisk the cream with the vanilla until just thick enough to stay in its shape. If you over beat cream it goes grainy and horrid and doesn't look very pretty!

When you are ready to assemble the cake turn out the layers and place the least attractive one (sorry but there almost always is an ugly sister) on the bottom. Use a good amount of cream for the two layers as you only need a small dollop for the top. I used just under half for each filling. Carefully place each layer on top of the last and the final dollop of cream can be roughly smoothed on top. Using your choice of fruit - I really recommend figs at this time of year - place on the top of the cake and around the bottom along with the chopped pistachios. Now you can drizzle the honey over the top of the cake. Use as much or as little as you like. It is nice to have a little extra left over in a small jug so that people can add more should they wish. I really hope you enjoy this cake. 

Sunday 10 May 2015

Blueberry and Cinnamon Porridge

The weather in Devon has been pretty miserable of late, and I was craving something a bit more substantial and comforting than my usual smoothie in the morning. I went out and got some organic gluten free oats and the next day made a wonderful bowl of the best porridge I have ever tasted. I added all my toppings BEFORE I started cooking. I recently started doing this after making buckwheat porridge. This ensures that the flavours really melt into the oats as it cooks and you are rewarded with a very tasty bowl of warming breakfast. I love to add cinnamon and blueberries as these two flavours are perfect together. The recipe below calls for a banana too but I have done it with half a shredded apple or some freshly grated lemon zest instead of the cinnamon which is also very yummy. Sprinkle whatever nuts, seeds or other berries you have to hand to serve. This is made with almond milk which I love, but you can easily substitute with any other milk or just water. I sometimes stir in a teaspoon of almond butter for a little extra boost. Sweeten with honey if you need to but the blueberries burst as you cook and stir so they tend to add enough sweetness for me. 


You will need (for 1):
1/2 cup oats (I used gluten free)
1 cup almond milk (or any other milk/water)
1 level tsp cinnamon
large handful of blueberries
1 small banana, chopped into small-ish chunks
extra nuts, seeds, berries for the topping

Into a saucepan add your oats, milk, cinnamon, berries and banana. Stir and transfer to a moderate heat and stir occasionally for about 10-15 minutes until the porridge is at the right consistency. You may need to add a little extra liquid as you go, depending on how you like your oats!
Spoon into your favourite bowl and stir through any nuts or seeds etc. The blueberries will start to burst and their delicious juice will run streaks of deep purple through the oats. 

Monday 30 March 2015

Chocolate and Cinnamon Pecan Pie

On Saturday I bumped into a few friends in the gym and an impromptu supper was formed for the following evening. We all decided to bring a dish or two and so we bid each other farewell and went our separate ways. Mad Ellie had run to the gym - 7 miles - done the pump class then cycled home again. Very Mad Ellie! 
Ellie had mad three amazing curries, onion bhajis, jasmine rice, minty yoghurt, curried potatoes and the list goes on. My friend Milla had brought her delicious lentil dahl and the best spinach saag aloo I have ever had. Lots of other people brought scrummy things and soon the table was groaning with a feast. After first, second and third helpings (guilty - the fish curry was mouthgasmic) it was time to clear away and start again on the puddings. Cue yet more delicious platefuls with about 7 or 8 different things to choose from. It really was a spectacular sight! 
I decided to make this pie as I thought it would go down well with those not accustomed to sugar or dairy free options. The base is a variation of the one I use for my Raw Chocolate Truffle tart and is a really excellent tart or pie case. I cannot tell you how amazingly delicious this is. I am always quite nervous feeding 'clean' puddings to other people as I never know what they will make of them. Some were sceptical pre-tasting but the response was truly overwhelming. Everyone who tried it said it was delicious and were intrigued as to how to make the gooey middle and the crumbly pastry-like base, One girl said it was the best pudding that night - there were a fair few wonderful creations so I was very pleased to hear that. I managed to sneak the last piece home and this morning I had it for breakfast outside in the glorious Spring sunshine. There was a cheeky little whippet who tried to get in on the action but I was not going to let anyone near my last segment of food heaven. 


You will need:
A loose bottomed tart tin
a food processor

For the base:
11/2 cups (175g) ground almonds 
1/4 cup (25g) cocoa nibs
1/4 cup (25g) broken up pecans
3 medjool dates, roughly chopped
1/4 cup (80ml) melted coconut oil
2 tsp cinnamon

For the middle:
1 cup (125g) pecans
1/4 cup (80ml) water
1 jar (170g) smooth almond butter
12 medjool dates, finely chopped
4 tbsp pure maple syrup
2 heaped tsp raw cacao powder

For the topping:
2 tbsp pure maple syrup
1 tsp cinnamon
1 cup (125g) pecan halves


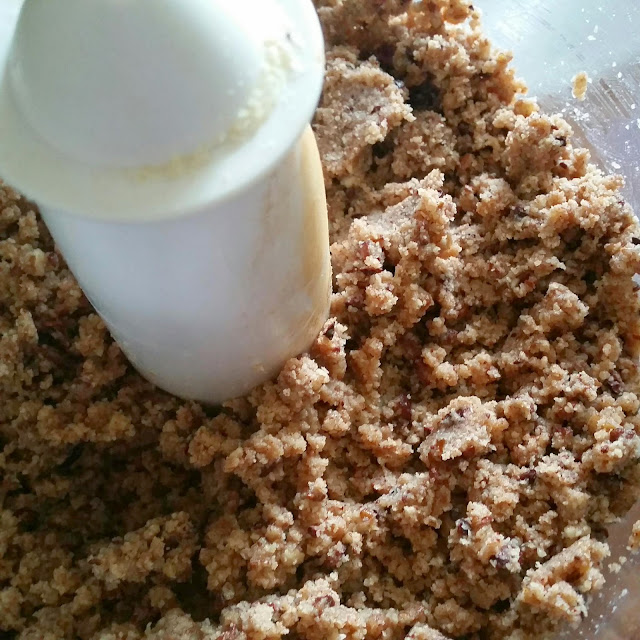
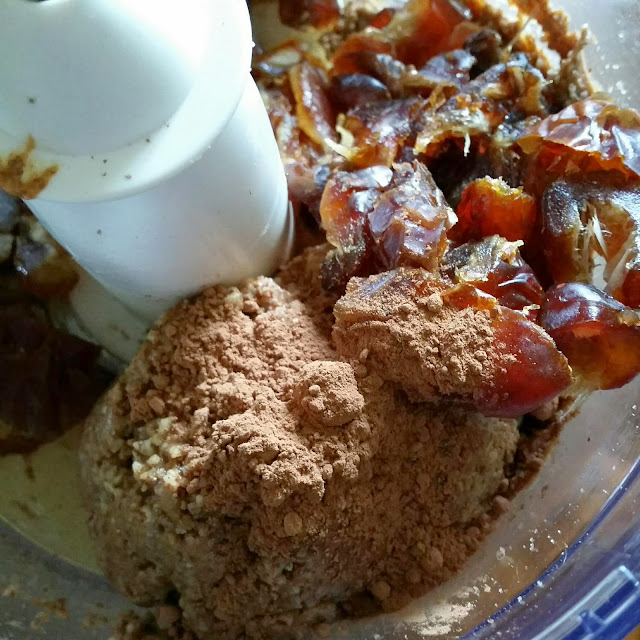
First make the base. Measure out all the ingredients and add them to the food processor. Pulse for 30 seconds to break up the nibs and pecans. Then blend for a further minute until the mixture sticks together when pinched.


Tip the mixture out into your tin. Using your finger tips press the mixture evenly and firmly in and around the tin. Pop this into the fridge for at least 15 minutes until you are ready to assemble the pie.


Next, make the middle. Tip the pecans into the food processor and whizz until just between the flour and butter stage, then spoon n the nut butter and blend. Add your maple syrup, cacao powder and chopped dates and blend, gradually adding the water a little at a time. You want the texture to be spreadable but not sloppy. 


When you have the desired consistency, scrape into a bowl and pop this into the fridge until you are ready to put it all together. (Have a sneaky teaspoonful of this glorious gooeyness whilst you think about life).


To make the topping, pre-heat your oven to 180 degrees C. Line a small baking tray and scatter your pecans. Sprinkle the cnnamon over the top and drizzle the maple syrup. Place into the oven for 3 minutes, stir and coat them with the sauce and pop back in for a further 2 minutes - be careful not to burn your nuts!! Whn ready take out of the oven, coat again and take off the baking sheet. 


To assemble, spread the middle evenly into your tart case with a palette knife. Add the glazed pecans in any way you like. Pop back into the ridge for 1 hour or until you are ready to serve. Take it out of the fridge about 10-15 minutes before serving to your lucky guests or just for you for breakfast...lunch...and supper. 


The pudding feast!  


Having my heavenly breakfast amongst the bluebells.


A hopeful whippet trying his best 'look-how-beautiful-I-am-surely-that-deserves-a-taste-of-whatever-is-going-on-up-there' face. Try harder next time.


Tuesday 17 March 2015

Moroccan Lemon Chicken Casserole

Mothering Sunday was this last Sunday in the UK - it falls on the fourth Sunday of Lent. I asked my Mummy to come over for lunch a while ago and was excited to cook for her. Food is a big thing in our family. And that's GOOD food. We talk about it constantly and love cooking for each other. But not just any old thing. I think we all like to impress the others and enjoy looking at satisfied faces at the end of a meal. My boyfriend and I are obsessed with food. We don't eat out that often simply because we think (quite big-headed of us!) that we can cook it better than your average restaurant. Usually I do the baking, he does the main courses. Team work but it also means we can't interfere with what's being prepared. At the moment said boy is away - STILL - so the main course was down to me for Mothering Sunday. Quite by accident the entire meal had a Middle Eastern feel - we had nibbles first which included my Courgette and Avocado Houmous, then this deliciously wonderful casserole and finished with my Pistachio, Almond and Carrot cake. Yum yum yum. Packed full of flavours and warmth, which was just as well because it was freezing on Sunday. So much for Spring. I promptly lit the fire and soon the house was cosy and the dogs were happy. Thank goodness for that! 
This dish is definitely better if you can marinade the chicken AT LEAST 6 hours beforehand. I marinaded mine the night before and popped it in the fridge for the flavours to develop. I serve it with cauliflower purée with masses of olive oil, cumin and coriander whizzed up with it. Serves 3-6 depending on how much cake you want afterwards. 


You will need:
6 large free range and organic chicken thighs -skin on and bone in.
2 large red onions
1 unwaxed lemon
handful of pitted green olives - drain and rinse thoroughly
handful of fresh coriander
500 ml good chicken stock
1 tsp turmeric
1 heaped tsp smoked paprika
1 heaped tsp cumin seed
2 large garlic cloves, roughly chopped
good olive oil

For the cauliflower purée:
1 large cauliflower
1-2 tsp heaped ground cumin
fruity olive oil
salt
pepper
small handful fresh coriander


The night before you want to make this, prepare the marinade. Crush the garlic with a pestle and mortar. Add the smoked paprika, turmeric and cumin seeds and grind to a paste. Add enough olive oil to make it runny enough to coat the chicken.
In a dish place the chicken and rub the marinade all over, making sure it is fully coated. Cover with  lid or cling film and leave in the fridge for at least 6 hours, preferably overnight. 


When you are ready to cook, pre-heat your oven to 150 degrees centigrade and heat a little olive oil in an oven proof dish and fry off the onions until they are soft. Add the chicken thighs skin side down and brown off. Turn over and brown the other side. Add the sliced lemon slices on top and some salt and pepper and enough chicken stock to just cover the meat. Cover with the lid and bring to a boil for about 1 minute. Place into the oven for 40 minutes until the meat is tender and almost falling off the bone. Whilst the casserole is cooking, make your cauliflower purée. Remove the centre of the cauliflower and roughly chop up the remainder. Boil for 3-4 minutes until tender. Transfer to a food processor and add a good glug of olive oil, salt and pepper. Whizz for about 30 seconds then add your ground cumin and more oil if necessary. Scrape down the sides and then finally add the coriander. Whizz again until smooth. Transfer to a dish and keep warm until you are ready to serve. 


When the chicken is done, add the coriander and olives and return to the oven for 5 minutes to warm the olives through. 


To serve I used a round cutter to plate up the purée and added a little extra coriander to garnish. Spoon out 1-2 thighs per person and a couple of olives and plenty of the fragrant onion and juices. 


Sunday 15 March 2015

Pistachio, Almond and Carrot Cake

Today was Mothering Sunday in the UK  and my Mummy came over for lunch and bubbles and cake! After a delicious lunch a  perfect afternoon was had. Fire roaring, five dogs snoozing and us curled up on the sofa with cups of tea and....more cake. So cosy and snugly! 

Mummy and I love carrot cake and I thought I would try and make a gluten free, dairy free and refined sugar free one without losing any of the glorious moistness and flavour of a perfect carrot cake. This is packed with nuts - pistachio and almonds - coconut and carrots. It is sweetened with the seeds of one vanilla pod, a couple of dates and pure maple syrup. The texture is sticky and nutty and full of flavour. I decorated it with more sliced pistachios and dried rose petals. If you don't like the taste of rose, don't add them! The glaze added gives the nuts something to stick to and adds a nice finish to the top. Enjoy with a cup of tea or a glass of bubbles. I recommend making it a day before you want to eat it so that the flavours have time to develop and the cake becomes even better. Store in an airtight container for up to 5 days. This is my new favourite cake to make...and eat. Just wonderful. 


You will need:
23 cm spring form cake tin, lined and lightly greased with melted coconut oil
200g ground almonds
150g pistachios, roughly chopped
100g dessicated coconut
3 large free-range organic eggs
2/3 cup (170ml) maple syrup 
1 vanilla pod 
200g carrots, peeled and roughly grated
2 tsp cinnamon
2/3 cup (170ml) melted coconut oil
2 medjool dates, chopped

To decorate:
large handful of sliced pistachios
sprinkle of dried rose petals
1.5 tsp organic raw honey
1.5 tbsp coconut oil


Pre-heat your oven to 140 degrees centigrade. Prepare your tin and all the ingredients. Slice the vanilla pod lengthways and with a sharp knife scrape out all of the seeds. 
In a food processor with blade attachment, whizz up the pistachios until roughly chopped and broken up.

In a large mixing bowl, using a hand-whisk, whizz up the eggs, maple syrup and the seeds from the vanilla pod until frothy. Add the almond flour, cinnamon and coconut and stir before adding the oil and mixing thoroughly again.

Add your grated carrot, pistachios and dates and mix again until fully combined. Pour into the prepared tin and pop into the oven. Bake for 45-55 minutes but check after 40 minutes to make sure it is cooking evenly. You may need to turn it round or cover loosely with foil to stop it from browning too much.


When the cake is baked - it should be springy and a skewer inserted into the middle should come out clean - place onto a wire rack to cool. Keep in the tin cooling for 30 minutes before turning out and leaving to cool completely - preferably overnight. 


To make the syrup, melt the honey and coconut oil together over a high heat and then pour over the cake. Use a pastry brush or palette knife to smooth over the cake. Scatter the sliced pistachios and rose petals. A perfect 'love cake'. 


I need another slice....NOW!